Friday, March 28, 2014

Yummy Over-Night Bread!

Yesterday was a sewing day with my nieces. My sister in law had made some bread. She told me that it was super easy and gave me the basics, but, of course, I forgot to write it down. When I got home last night, I googled recipes based on what I could remember.
I found this delightful blog!
http://heavenlyhomemakers.com/easy-overnight-no-knead-yeast-bread

My finished product:

The center of mine is a little gooey because I was outside (feeding the animals) when the timer went off and my husband turned off and opened the oven for me.  That was nice, except I had it set at 30 minutes for checking and the directions say 30-40 minutes. My bread needed the last 10 minutes.  Excellent taste and texture!
Thanks for sharing!

Monday, January 20, 2014

Tutorial Summer Baby Blanket Part 2

Row 2: *(4 dc, ch 3, dc) all in next ch-3 space* across, dc in 3rd ch of turning ch-3. Ch 3, turn.
You are crocheting into the "hole" created on the previous line when you chained 3.   
 Note: I hold my needle incorrectly so the way it is sitting in the pictures may differ slightly from how it looks in your hands.

 Crochet the 4 double crochet into the hole created by the chain 3.


 Crochet the 4 double crochet, followed by chain 3,
 Double crochet into the same hole,
 After the 1 double crochet after the chain 3, start double crocheting the 4 into the next group of chain 3.


If you have any more questions, let me know.
I am loving this lady's blog, bye the way!

http://lacycrochet.blogspot.com/2013/06/summer-baby-blanket-in-variegated-yarn.html

This is how I understand it.  I wont know til I am able to get back around to this turn on the return trip.  I'll let you know.


Oh, and this cute baby is why I am posting so late!

Tutorial On Starting the Summer Baby Blanket Part 1

A friend of mine is working on a baby blanket using this lovely pattern:
http://lacycrochet.blogspot.com/2013/06/summer-baby-blanket-in-variegated-yarn.html

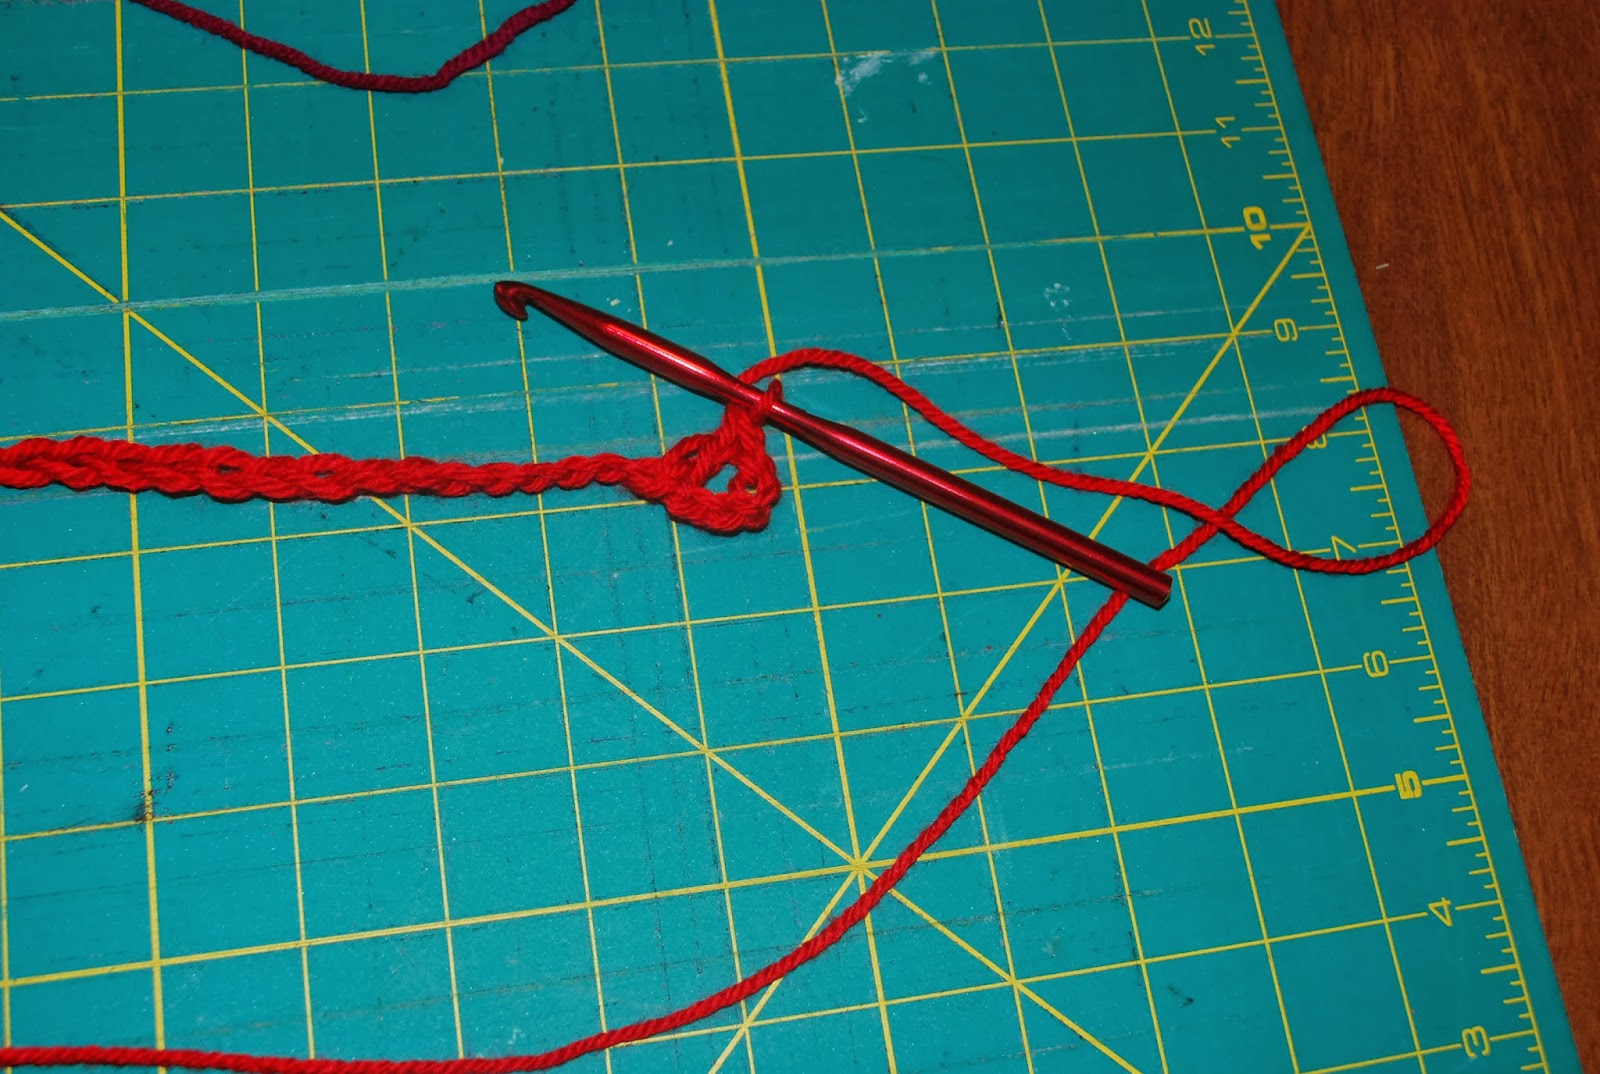
She asked for a little help with starting it, so here it is.  Chain the desired number of stitches.  The red one is not 141 stitches, it's much less.  The lady from the original blog uses a smaller E hook but I have been using and loving my K hook a lot lately and like the quick and easy nature of it.  So, chain your desired amount.
The directions go like this:
Row 1: (4dc, ch 3, dc) all in 5th ch from hook, *skip 5 ch, (4 dc, ch 3, dc) all in next ch* across, dc in last ch. Ch 3, turn.
Count five stitches back from your hook.


Double crochet in that spot, repeat till there are 4 double crochets in that 5th chain from hook.
Chain 3
Double crochet in the same spot.

Count out five more chains, put a double crochet into the fifth chain from your last group.
Repeat double crochet til there are four in that spot,
Chain 3 again, 

Double crochet in the same  hole as you last 4 Double Crochets,
Count 5 chains, double crochet in the fifth chain.
Repeat across the the entire chain til the end.  If I read the directions correctly, you then put a double crochet in the last chain on the string.  I may have that part wrong, but it's what I have done.  It is also important to have cute children reading books near bye while you do this. Hope this helps. I will now take pictures for the turn and 2nd row of stitches.

Friday, February 8, 2013

Simple 15 Minute Dress


One (plus) yard of fabric. I help up the piece and then cut it at the length I wanted it to be, which was thankfully at the edge of the pattern.  One seem right up the edge til about 18 inches from the top.  Then I seem up the edges of the remaining chunk.  I slipped it up over me, and pulled up the back and the top of the fabric pieces that I hadn't sewed together and made a short stitch, about one to two inches with about a 7 inch gap in the middle.  Simple...and with knit, quick because you don't have to finish the edges unless you want to.  I grab the "weird" pook under the arm and then use and little bit of thread to sew it together in the middle. Done.  comfy.

Thursday, February 7, 2013

Baby Sling

Following this link:
http://www.mayawrap.com/n_sewsling.php
and using this fabric:
 And using rings found at the local hardware store:
 We have a sling!


Monday, July 2, 2012

Sabryna's Twirly skirt

 My lovely niece Sabryna (pictured here) needs a new skirt.
A year or so ago, I found this fabric which seemed to scream: "Sabryna's Skirt!!!!"
Finally, she was here, we had time, and...she liked the fabric.


 Here she is in the finished product.  I would love to have made this a tutorial but, alas, I did a lot of eye-balling and guessing. Also, I did not take pictures as I went along.


 We added the ruffle because she wasn't comfortable with it being so short.  I used a layer of tulle and two layers of pretty, light fabric.  It turned out splendid!

Thursday, June 7, 2012

Pillow Case Dress (Attempt 1)

Down at Pandora's Box Fabric Store, these fabrics were waiting for me.

 Little dress from every angle.


 Flowers and dresses and little girls...

 Ruffle up front and straps that match.

I should note that when I started to sew these strips together, I desperately wanted to keep going and turn this into a quilt.  Maybe I will go back to buy more for a quilt. Maybe.


http://www.bing.com/local/details.aspx?lid=YN722x12555307&q=pandora%27s%20box%20fabric%20store%20Cottage%20Grove%2c%20Oregon&qt=yp&tid=dac00d1c8f354cc6a00663fd6bfb8425&mkt=en-us&FORM=LLSV